Today I made a fun card for the sketch challenge at splitcoaststampers with a fun button treatment so I figured that would make for a good first post. I had seen a beautiful card by Dina Kowal that features an awesome new technique with buttons and wanted to give it a whirl. It is really simple, but packs a nice WOW factor. You'll need 4-hole buttons and some twine. Dina used a natural twine, but I chose some Baker's twine for my bright colored card today.
 |
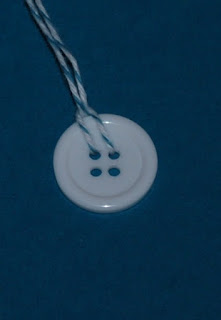
| You simply cut a length of twine and feed each end through a hole. Start to pull these ends through a ways leaving yourself a generous loop on the opposite side. |
 |
| Thread both the ends through the loop and pull tight. |
I then laid this against my card stock strip to see what length I'd need for the other side. I cut myself another piece of twine and repeated the process with the other 2 button holes. I then adhered the ends to the back side of my card stock strip. For this card (which also met a color challenge of Lucky Limeade, Daffodil Delight and Island Indigo) I chose to cover the 3 white buttons with paper flowers.
You can thread from the front of the button toward the back as in the top left green button, or from back to front as in the bottom right green button.
Supplies that I used for this card were:
| Stamps: Up in the Air by Stampin' Up | ||
| Paper: Island Indigo, Whisper White, Daffodil Delight, Lucky Limeade | ||
| Ink: Island Indigo | ||
| Accessories: Buttons, Baker's Twine, Michael's paper flowers, tag from Christmas card, Word Window, Corner Rounder, and square punches The Particulars: When I saw today's sketch at splitcoast , I thought I could do a scaled down version with the buttons treatment I already had in mind. My sentiment panel is a piece I stole off a Christmas card. I covered the mid-section with a piece of Limeade with the ends notched using a square punch. I stamped my sentiment in Indigo on Whisper White and used the word window punch. I rounded some corners for added interest. I left off the bottom circle embellishments and top banners since I'd added so much already to the left panel. I was also influenced by the clean lines and shaped tag of Marleygo's card today. |


What a great first post! So excited to see you have a blog and looking forward to seeing more of your work!
ReplyDeleteSuper! Congrats on your blog and will enjoy viewing your creations. Thank you so much for sharing. <3
ReplyDeletecongrats! You seem to be a pro at doing a blog already. Thanks for the tutorial. Pretty card. (cardmaker86)
ReplyDeleteCongratulations on your blog! Love the button treatment. Thanks for the tutorial.
ReplyDeleteVery pretty. I love the colors. I'm "new" in the blogging world too. Took a hiatus for a few years. I'm confused most of the time now!
ReplyDeleteCongratulations on your first post to your new blog. Now you're off and running...good luck!
ReplyDelete