Magazine Image Transfer with Gelatin Plate
Many people have done tutorials on image transfers so I am adding this mainly because of lessons learned along the way. My main tip is to keep your layers really thin...like almost transparent. Also, the quality of the magazine is important; you are looking for high gloss. Additionally, you want a lot of contrast between the image and background.
 |
These are from Marie Claire magazine. I am using the bottom one in the following pictures.
 |
Gathe all your supplies: gelatin plate, dark paints for 1st coat light for the 2nd, brayer, some items to add texture if you desire, paper for printing and brayering off
|
|
 |
| Even this small amount of paint required a bit of brayering off to get the paint a thin enough coating. I usually use a couple of colors but they all need to be dark. |
 |
| As soon as you have that very thin coat lay your image face down. Quickly rub lightly to make sure all of the paper has made contact. You aren't trying to massage, just get air bubbles out and have all the ink touching paint. Pull right off. Allow the paint to dry before the next step. This goes much quicker if your coat was thin enough. |
 |
I used about the same amount of paint for the second coat but in light colors this time. Add texture to non-image areas...I keep my original.image in view to see where there are blank areas. You have a great thin coat if you start to see the image through this layer.
|
|
Lay your paper down and this time you want to really give a good rub to get all the paint to pull.
|
|
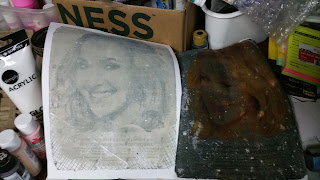
I lost a lot of this one. I think I let the paint sit too long before pulling
|
 |
| Lost detail on the right side but still a cool print. |
|
|
 |
| I really like the way this one turned out. Lots of great contrast in the original image. |


