Pages

Monday, August 25, 2014

Coloring the Etching


I wanted to make a card from the spray of flowers I created using the stamp etching technique. (I showed my step by step photos on the previous post.) I followed Lydia's tutorial to add depth to an open line image using a fine point pen.

This was my starting point today. I had stamped the flowers twice and drew in a few added stems and buds before adding in the "flicked" lines. I just purchased some distress inks (I know...I'm WAY late to that party!) and wanted to add color using them. I smooshed my ink pads onto a piece of acetate packaging and used a wet brush to watercolor from the ink.
You can see that I lost a lot of the "etched" details. I knew this would happen because I had used a water-based marker. It also muted the colors a bit. I used the leftover ink on my "palette" to spatter onto my image. I used two spatter stamps to add the spatter onto the card base.


I took my marker and added back some more detail and also put a bit more of the raspberry color.
 
Here's the finished card. I used my ink pad to carefully ink just the sentiment that I wanted to use on this card which will go to a lady at our church who is having surgery this week.

Sunday, August 24, 2014

A Unique Blog Hop


     I'm excited today to be participating in a Unique Blog Hop. I was invited to join in by Christina Franco who I know as fellow stamper, allamericanstampers, on the Splitcoaststampers site. We both like to participate in the challenges over there and have commented on each other's cards. She makes some beautiful cards! I hope you'll head on over and check out her awesome blog Blessings Ink.
     Part of this hop is to answer some questions about my stamping so here goes!

1. What are you working on currently?


One of the things I enjoy, is trying out new techniques. This technique was shared by Lydia/Understandblue as the weekly tutorial at splitcoast. She calls it stamp etching. It is a fun way to add some depth to open line stamps. It really breathed new life into this retired SU set. All it takes is a fine line marker and some "flicking" to add depth to your images. I will probably end up fussy cutting or tearing around this before adding it to a card. 
2. What's your style-what sets you apart?
I'm a very eclectic stamper and like to try all sorts of things, but one thing I do gravitate toward is more neutral or natural elements. The result is that I often end up with cards that are more masculine. Here are a couple of cards I made during the Dare to Get Dirty Challenges that fit the neutral/natural bill.


I don't tend to do a lot of coloring and I don't follow all the latest trends, but I have jumped onto the mixed media bandwagon and tried more mixed media techniques lately. Here's a tag I made mixing acrylics, ink and embossing powder,
I also like to use found items (just ask my family....they laugh at the things I pick up or keep to use later)
I kept these curly pieces of my squash vine that paired well with the shell fragments for this beachy card.
3. What Inspires Me and How Did It All Begin?
I love to create cards for the people in my life. This was for my youngest daughter. I enjoy creating things that are unique and special just like the people for whom I am creating the cards.

My husband is a pastor, and I also like to create cards that he can use in ministry.
Pinterest is a source of inspiration to me. I keep a (large) board of inspiration photos that I can peruse when I'm looking for a spark. I also do a fair bit of gallery gazing at splitcoast and keep a favorites board there for ideas and techniques to try.
I actually started scrapbooking before I got into card making. My foray into stamping began when my now 24yo daughter went to a 9th birthday party for a friend and they stamped frames and a gable box at the party. It seemed like it would be a fun way to connect with my girls and would (cough cough) save me lots of money on cards. Who knows how many dollars later, I'm still enjoying involving my kids in my stamping and making the cards my family uses as well as keeping a card rack in a store in our town where I sell some of my creations.
4. How Does Your Creative Process Work?Well, in a nutshell, messily!
This was my desk mid the week long marathon of challenges known as Dare to Get Dirty! Notice the coffee cup in the center...also a key to the creative process. I often have a book on tape playing in the background or sometimes a movie (one I've seen before usually) playing in the "movie pit" which is adjacent to my stamping area in our mostly unfinished basement. I have trouble visualizing things, so I usually place items onto my card and try them out till I get a combo that works for me. I often make two or three times as many elements as I need and those end up in my leftovers pile. I sometimes challenge myself to a day of "scraps only" creating. Here's a quick card I made using only thin strips of paper that accumulate and get bagged up from the trimmings at my tabletop cutter.

I've had a lot of fun thinking through these questions and am looking forward to tracing the blog hop backwards and reading what others had to share about their art.
Now it is my turn to move the blog hop forward. Today I'm introducing another stamper I met on splitcoast. Melissa and I served on a design team together and I love her blog. She and I have a few things in common I think! She describes herself as:
a simplicity seeking, camera crazed crafter! I admire her clean style and I think you'll really enjoy her blog Oh, Smudge! Check it out and leave her some love!Be sure to visit Chris as well where my blog hop adventure began and thanks for the opportunity to play along!
Watch for another post soon, I hope, with another stamper to add to the hop. Thanks for joining along in the fun!

Thursday, August 14, 2014

Collage for my Dad

     This weekend we'll gather to celebrate my parents' 55th Anniversary and my dad's 80th birthday. I posted the anniversary card already, but here's the collage I made for my dad.

The completed project. I took the picture before putting it into the shadow box to try to prevent flash glare.
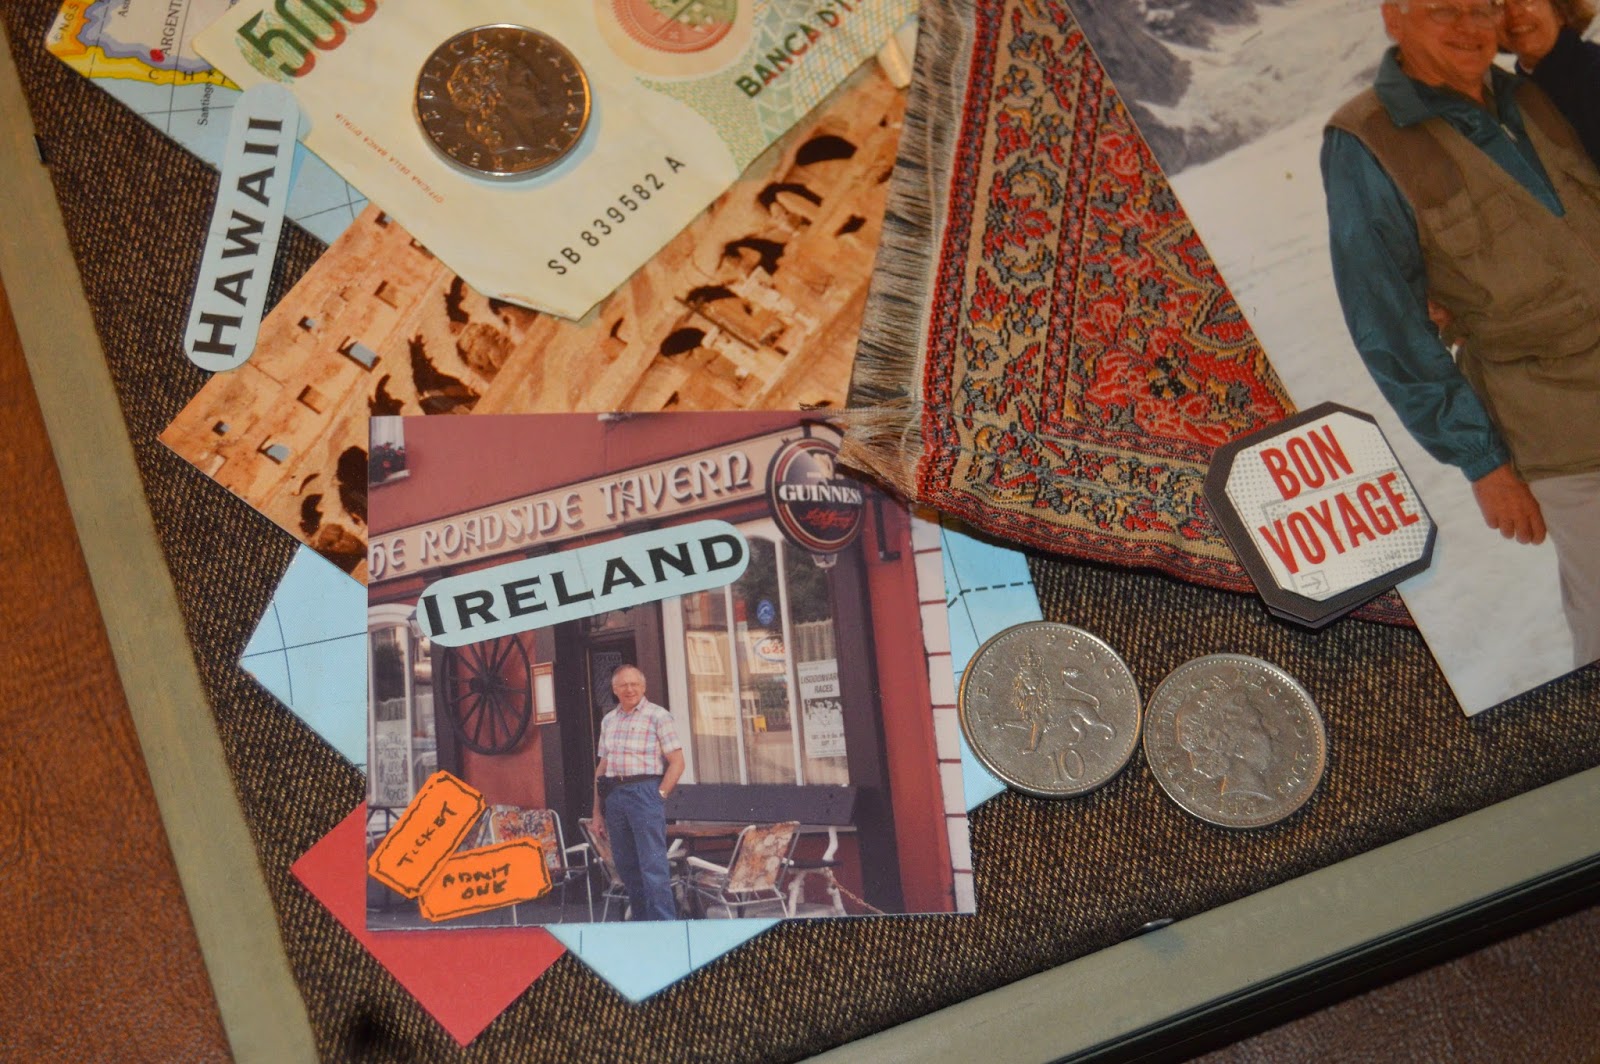
I used a base of fabric taped over the shadow box base which is 16x20". I took game pieces from a National Geographic map game and added dots onto each country they've traveled to.

My cool find was the Around the World in 80 Days album at a thrift store. I diecut letters, taped to a piece of paper then used a finepoint Sharpie to add details similar to those on the album cover. I wanted the words to stand out more, so I traced around them all with the Sharpie.

I've used foreign coins and paper money as accents. I also punched a few pieces of paper to add more color. Mom gave me some travel photos to add in.

Some of the photos had my mom's captions on them and I found some fun 3D travel stickers to add too.

I also had kept post cards they sent us and was able to include a couple of those...this one my dad actually wrote! The blue country names were from a Taste of the World dinner we attended that had a passport to carry along and have stamped at the different country's stations.

I love this photo!


Monday, August 4, 2014

Dare to Get Dirty 2014


I've been away from my blog for far too long. I have been busy the last few days trying to play along in the Dare to Get Dirty Challenges for fan club members at splitcoaststampers.com. They're loads of fun and there are LOADS of them! I'm uploading a couple here that have close up photos to go along with them.
I made an embossed metal butterfly laid over lace on this one. I embossed my sentiment in copper onto a panel cut from a greeting card someone sent me.

I used alcohol inks-copper and purple to add color to the metal.Stamps: Warmest Regards Paper: Natural White, greeting card dp Paper Size: A2 Ink: Versamark, Alcohol Inks Accessories: Graphic 45 Butterfly Blank, Vintaj embossing die, Classy Copper ep, Lace, CE Techniques: Embossing, Metal Embossing

Read more: http://www.splitcoaststampers.com/gallery/photo/2544562#ixzz39T7KFO7z

I took a wood piece and painted, embossed and rubbed more paint to "shabby" it up. I used liquid pear and gem accents.

This went onto an anniversary card for my parents who've lived most of their married life in the Chicago area and the last 11 years in the city itself.Stamps: Verve-Happy Anniversary, VLV-Chicago Skyline Paper: Very Vanilla, Brushed Gold, Doily Paper Size: A7 Ink: Versarmark, Encore Gold Accessories: Offray Gold Mesh Ribbon, Timeless Type die, Gold ep, Gold Organdy, Simply Surfaces Wooden Chandelier, TH Distress ep-Antique Linen, gems, Liquid Pearls-Buttercup, Recollections Milk Paint, Acrylic Gold paint Techniques: Embossing

Read more: http://www.splitcoaststampers.com/gallery/photo/2545210#ixzz39T7ZKqD2
Here's a wedding card that I made today for my DD to use.
This features felt flowers made with SU's Spiral Flower Die and some Little Leaves cut from transparency paper. I overlaid a vellum sheet with my embossed sentiment over the card base that I dry embossed in the Elegant Lines ef.

Easier to see the embossing and dry embossing on this close up.Stamps: Stampabilities-from this day forward Paper: Very Vanilla, Vellum cardstock, Acetate Paper Size: A7 Ink: Encore Gold Accessories: Felt, Spiral Flower Die, Little Leaves Die, Ribbon, Clear ep, Elegant Lines ef, glue dots, sticky sheet (for the flowers)Techniques: Dry Embossing, Embossing, Spiral Flower

Read more: http://www.splitcoaststampers.com/gallery/photo/2545699#ixzz39T7pHdbE